612-470-8575
Thinking of Buying or Selling? We have top real estate partners nationwide! Reach out first for expert guidance and a home value report. Click the "Request a Quote" Button to connect!
Concrete Finishing
The key to concrete finishing is the right tools, timing, and proper technique. Here is the step-by-step process the professionals use.
Tools Needed (to finish a standard square patio with a broom finish):
- Magnesium Float
- Edger
- Wet Cutter (optional - only needed if you decide to do wet cuts)
- Knee Boards
- Finish Broom with Handles
Step #1
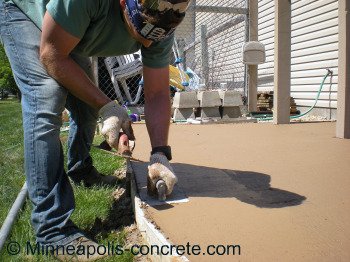
Make an edge on the perimeter of your patio. Place the edger tool flat on the concrete and parallel to the form. Raise the end of the edger (the end that faces the direction you are moving) slightly. Slowly move it along the side of the form.
Step #2
You have a choice: Either wait until the concrete is dry and use a concrete saw to install control joints and decorative cuts, or use a wet cutter and place the control joints right now. The benefit of doing it now, is you'll be done with the cutting process and you'll not need a concrete saw to finish it. The downside of doing it now is you may be rushed to finish all of the concrete on time before it dries. Generally, the smaller the patio, the easier it is to do wet cuts. Click here if you choose to do wet cuts now. If you choose to do dry cuts, go on to step 3.
Step #3
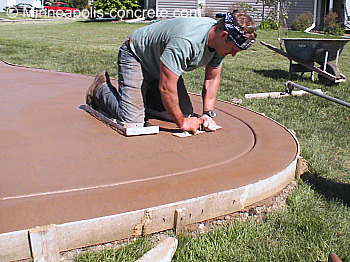
Make sure the concrete is hard enough to support your weight. If so, smooth the surface out with the magnesium float. More specifically, smooth out bow float lines and seal the surface from exposed rocks. Kneel on the knee boards on top of the concrete. The concrete should not give way more than 1 inch under your weight. Run the magnesium float back and forth over the concrete in a fan-shaped motion. In this patio, we installed a wet cut border and are now smoothing out the surface with a magnesium float.
Step #4
Lightly drag the finish broom across the surface. This needs to be done on exterior projects to minimize the risk of people slipping on the concrete. It "roughens up" the top surface a little bit. Make sure the concrete is fairly stiff so it doesn't roughen up too much, unless that's your preference.
If you skipped step 2 and still need to make dry cuts, do this the day after concrete finishing.
The next steps in diy concrete are concrete curing and concrete sealing.
Sound too complicated? If so, and you live in the Minneapolis and surrounding suburbs area, request a quote on your project here.
License # BC721668


New! Comments
Have your say about what you just read! Leave me a comment in the box below.